GLSLでモーフィングをやってみる
GLSL Tech Night 2018というイベントで、モーフィングのデモをみて感動したので挑戦してみました。
探してみると参考になる記事が結構沢山ありました。
まずはモーフィングさせるシェイプを描くために必要な距離関数について調べてみました。
距離関数とは
その名の通り中心座標からの特定の座標(ピクセル)までの距離(長さ)を返す関数です。
円を描く
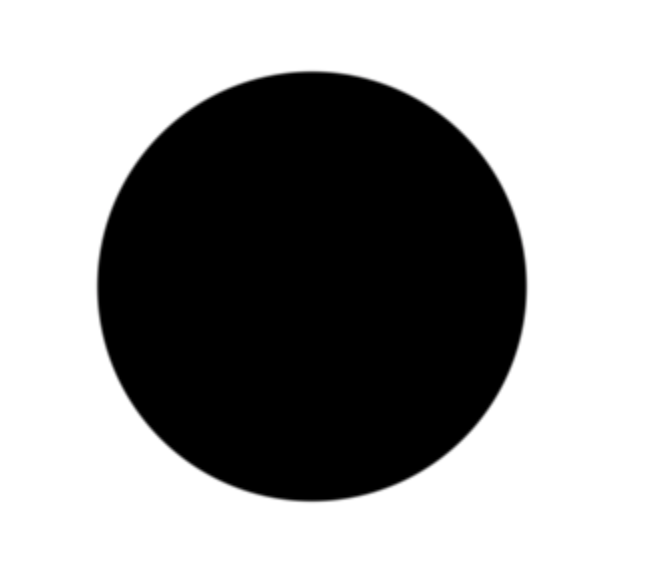
//円の距離関数
float circle(vec2 p) {
   return length(p);
}

void main( void ) {
    vec2 p = (gl_FragCoord.xy * 2.0 - resolution) / min(resolution.x, resolution.y);
    float d = circle(p);
    vec3 color = vec3(smoothstep(0.5,0.51,d));
    gl_FragColor = vec4(color, 1.0);
}
正方形を描く①
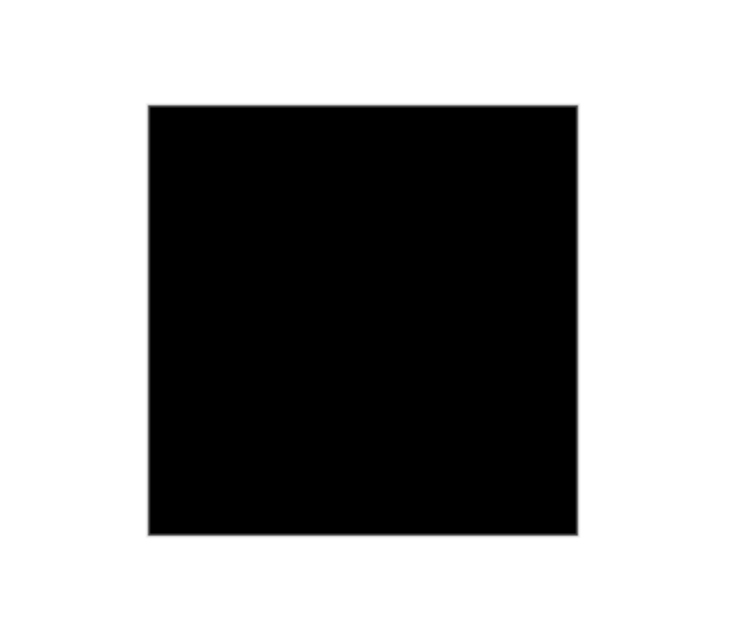
//正方形の距離関数
float square(vec2 p){
    return max(abs(p.x),abs(p.y));
}

void main( void ) {

    vec2 p = (gl_FragCoord.xy * 2.0 - resolution) / min(resolution.x, resolution.y);
    float d = square(p);
    vec3 color = vec3(smoothstep(0.5,0.51,d));
    gl_FragColor = vec4(color, 1.0);
正方形を描く②

//正方形の距離関数
float square(vec2 p){
    return abs(p.x) + abs(p.y);
}

void main( void ) {

    vec2 p = (gl_FragCoord.xy * 2.0 - resolution) / min(resolution.x, resolution.y);
    float d = square(p);
    vec3 color = vec3(smoothstep(0.5,0.51,d));
    gl_FragColor = vec4(color, 1.0);
}
多角形を描く

const float PI  = 3.141592653589793;
const float PI2 = PI * 2.;

float lPolygon(vec2 p,int n){
  float a = atan(p.x,p.y)+PI;
  float r = PI2/float(n);
  return cos(floor(.5+a/r)*r-a)*length(p);
}

void main( void ) {

    vec2 p = (gl_FragCoord.xy * 2.0 - resolution) / min(resolution.x, resolution.y);
    //5角形を描く
    float d = lPolygon(p,5);
    vec3 color = vec3(smoothstep(0.4,0.41,d));
    gl_FragColor = vec4(color, 1.0);

}
星型を描く

const float PI  = 3.141592653589793;
const float PI2 = PI * 2.;

float lPolygon(vec2 p,int n){
  float a = atan(p.x,p.y)+PI;
  float r = PI2/float(n);
  return cos(floor(.5+a/r)*r-a)*length(p);
}

mat2 mRotate(float a){
 float c=cos(a);
 float s=sin(a);
 return mat2(c,-s,s,c);
}

float lStarPolygon(vec2 p,int n,float o){
 return (lPolygon(p,n) - lPolygon(p * mRotate(PI2 / float(n) / 2.),n) * o) / (1.-o);
}


void main( void ) {
    vec2 p = (gl_FragCoord.xy * 2.0 - resolution) / min(resolution.x, resolution.y);
    float d = lStarPolygon(p,5,.6);
    vec3 color = vec3(smoothstep(0.4,0.41,d));
    gl_FragColor = vec4(color, 1.0);

}
モーフィングさせる
モーフィングはmix関数を利用して行います。 mix関数は線形補間を行うので、第三引数の値を変えることでモーフィングを実現できるみたいです。 イメージは以下の感じです。
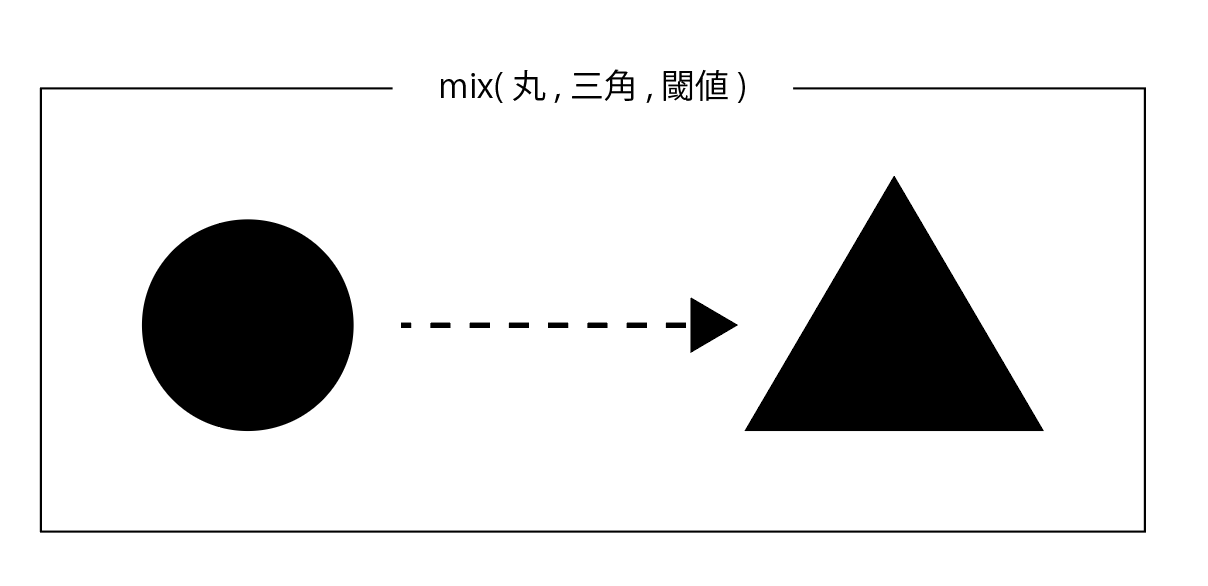
閾値は0.0 ~ 1.0のサイン波になるようにします。
float a = sin(time * 5.0) * 0.5 + 0.5;
複数のシェイプをモーフィングさせる
一部だけ抜粋します。 ポイントは、
- シェイプを描画用の関数を切り替える関数を用意します。
- mod関数と経過時間(time)でカウントアップしていきます。
- fract関数を利用して、小数点以下をmix関数の閾値として利用します。
float getShape(vec2 p, int i) {
    if (i == 0) {
        return circle(p);
    } else if (i == 1) {
        return square(p);
    } else if (i == 2) {
        return lStarPolygon(p,5,.6)* 1.5;
    } else if (i == 3) {
        return square2(p);
    } else {
        return lPolygon(p,3) * 1.5;
    }
}

void main() {
   vec2 p = (gl_FragCoord.xy * 2.0 - resolution) / min(resolution.x, resolution.y);

    float t0 = mod(time , 5.0);
    float t1 = mod(time + 1.0, 5.0);
    int i0 = int(floor(t0));
    int i1 = int(floor(t1));
    float f = fract(t0);

   float d = mix(getShape(p,i0), getShape(p,i1), f);
   vec3 color = vec3(smoothstep(0.5,0.51,d*1.5));
   gl_FragColor = vec4(color, 1.0);
}